Let's learn how to make horse figurines using the origami technique. How to make a paper horse Origami horse for children
The year of the horse has come, and this symbol began to appear more and more often in the homes of various people. Many are absolutely sure that this animal is not just a talisman for the coming year, but is also capable of bringing wealth and good luck to every home. Nowadays, you can increasingly see a horseshoe that protects the family hearth from evil forces. You can buy it or make it yourself. This process is quite simple. But how to make a horse out of paper so that it becomes a worthy interior decoration? You can simply cut it out of whatman paper, hang it on the wall and decorate it beautifully, or you can make a three-dimensional figure and place it in the most visible place.
Japanese motif
One of the most ancient arts of Japanese culture is origami. In modern schools they even teach it to children. After all, such a technique is not only capable of developing children, but also training fine motor skills of the fingers, as well as instilling a sense of neatness. In any interior, such a decoration can become a highlight that is sure to attract attention. All you need is a white or colored album sheet and scissors.
Instructions on how to make a paper horse
First you need to bend the sheet and make a triangle out of it. Afterwards, two opposite corners should be combined, and the part that remains should be cut off.
Bend the opposite corners and make a triangle again, return the sheet to its previous position.

We bend the original triangle so as to obtain a square, and bend the excess part to mark the place of the bend.
The corner of the folded sheet must be folded. The base should be shaped like a square.
Now you need to make a pentagon by bending the figure and turning the acute angle downwards with the base.
The sharp corner must be cut to create several ends.
One end needs to be folded and cut to form the horse's muzzle.
To make legs, you need to fold one end into a thin strip and turn it to the side. Do the same for the rest of the legs.
After finishing the work, you can decorate the figure as you wish. You can use beads for the eyes, and fringe for the mane. The diagram below will help you make it correctly.

Volumetric figure of a horse
This decoration will fit perfectly into any interior. And to make it you will need thick paper, a template of a horse figure, a piece of wire, buttons, paints, guipure, woolen threads and glue.
Instructions on how to make a horse from paper and wire
The template with the figure of the animal must be attached to the cardboard, carefully traced and cut out. To do this, it is better to use a stationery knife.
Since you can make a horse out of paper not only white, it is better to decorate the cardboard right away. Here you can use your imagination and choose any color you like. Crafts made using the “Hard Brush” technique look interesting. This will create beautiful shadow transitions, and the surface itself will be porous.
Now you can attach the mane and tail. Wool threads will perfectly serve as a tail, and guipure fabric can be used as a mane.

Now all the details must be carefully connected with a thin wire.
The finished figure can be attached to cardboard, or can be used for volumetric appliqué. Volume can be created using buttons that need to be glued to paper.
The main background can be absolutely anything. It all depends on the imagination of the person.
So let's go through a short master class "How to make a horse out of paper." As you can see, nothing complicated. The main thing is to carefully consider all the decorative elements to decorate the product. It is very important not to violate the technology of performing work. Any decor elements can be changed to your liking. Do not be afraid to bring something of your own to the craft. Only such an accessory can become an excellent gift for your friends or a wonderful decoration for your home.
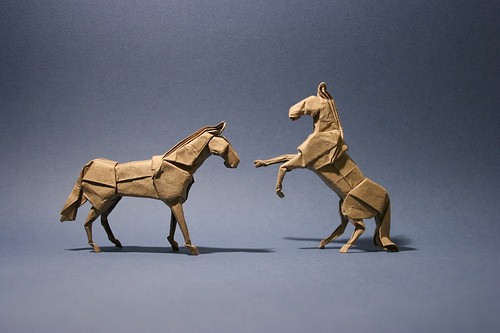
The graceful horse is the favorite animal of many of us. This animal, captivating with its beauty and power, has long been revered as a symbol of animal strength, courage, grace, loyalty at the same time, freedom, glory and fearlessness. It is believed that if you keep a horse figurine on your desktop, success, luck and prosperity will certainly visit you. In addition, according to the figurine of this fearless animal, it helps strengthen your business reputation. And if you want to show a small sign of attention and give your loved ones a small present with meaning, we recommend that you learn how to make a horse out of paper.
How to make an origami horse out of paper?
Origami is the now popular art of folding various paper figures, originally from ancient Japan. To create a horse, we only need a sheet of A4 paper and scissors.
- To begin with, we need to make a square out of a rectangular sheet of paper: to do this, bend one of the corners diagonally, and then cut off the excess with scissors.
- Unfold the paper and then fold it on the other diagonal to create another line. Expand.
- Then fold the sheet in half horizontally and unfold.
- Fold the sheet first along a diagonal line, then the sides need to be folded along a diagonal fold and hidden inside the workpiece to form a rhombus.
- Both sides of the upper rhombus need to be bent to the center. Then we bend to the middle and the upper triangle of the figure.
- Unfold the top diamond and use scissors to cut the top sheet from the bottom edge to the horizontal fold in the center.
- Bend the resulting triangles to the top, forming two identical rhombuses.
- Each rhombus must be folded horizontally in half towards the middle.
- Then turn the workpiece over to the other side.
- With the top diamond, repeat steps 5-8.
- Turn the paper horse craft over 180 degrees and bend the triangle in the central part with the corner facing up.
- Pull out and spread the edges of the figure so that you can find a small square marked with lines.
- Fold the square in half horizontally and fold its sides towards the center. This will be the body of our future paper origami horse. Iron the folds of the figure.
- Let's take care of the “limbs” of the horse. Fold the top right triangle to the side so that the bottom side of the piece forms a horizontal line. Unfold and bend the corners inward along the marked fold lines.
- Bend the upper left triangle slightly.
- Unfold and bend the corners inward along the marked lines.
- All that remains is to bend the very tip of the head inward so that the cute face of our horse is not so sharp.

Fold in half vertically and unfold. As a result, we should get a paper square with clearly marked lines.


DIY horse made of buttons and paper
An original and unusual horse is made from such accessible materials as paper and buttons. Moreover, thanks to this combination, the legs of the graceful figure can move.
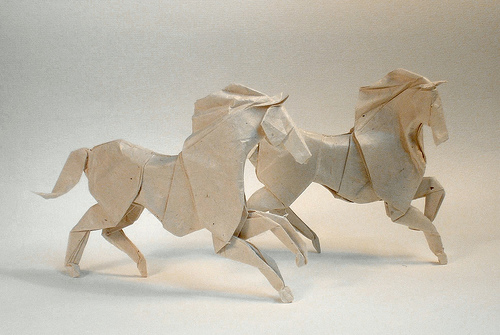
Making an origami horse will appeal to all lovers of this beautiful and strong animal, symbolizing freedom, fortitude, wisdom and will.
There are quite a lot of ideas for assembling horses in origami style. Professionals assemble complex models that include 40 or more actions.
The master class will tell you how to make an origami-style horse in different ways. Even beginners can cope with the presented assembly diagrams, and it is recommended to watch the detailed assembly of more elegant and complex origami figures in the video.


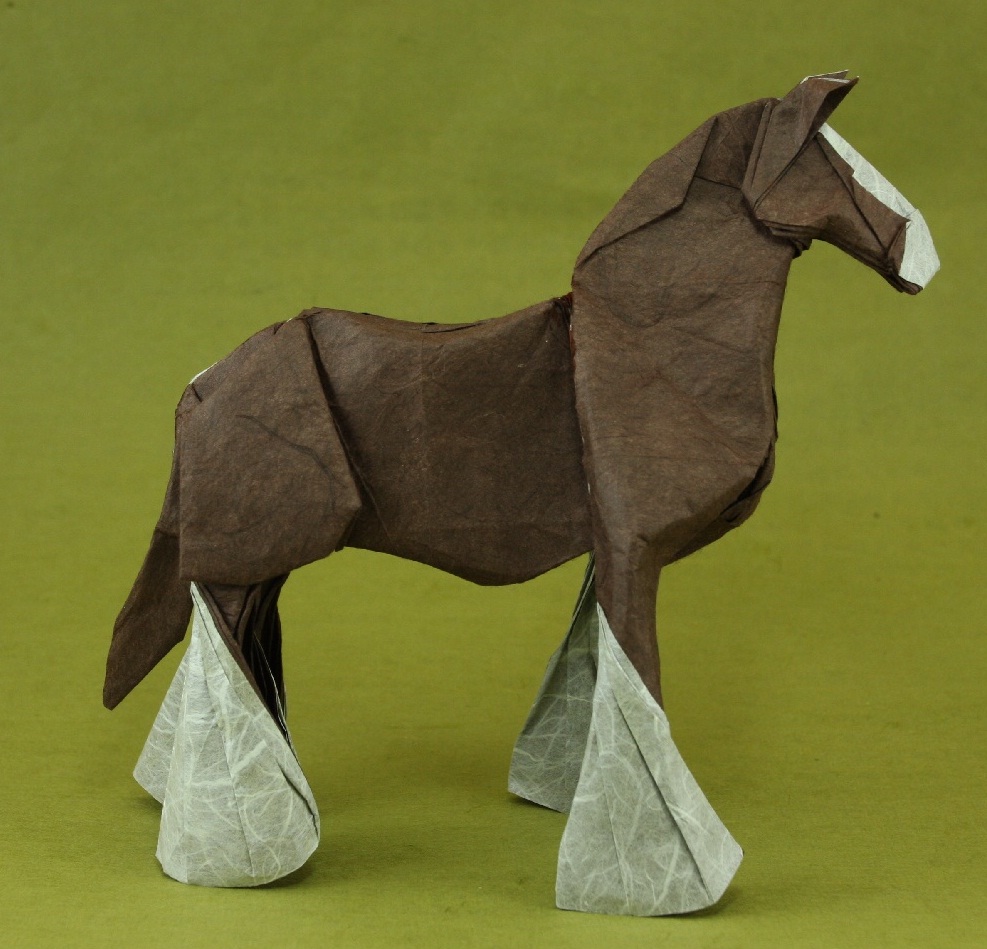
Making a herd of paper horses
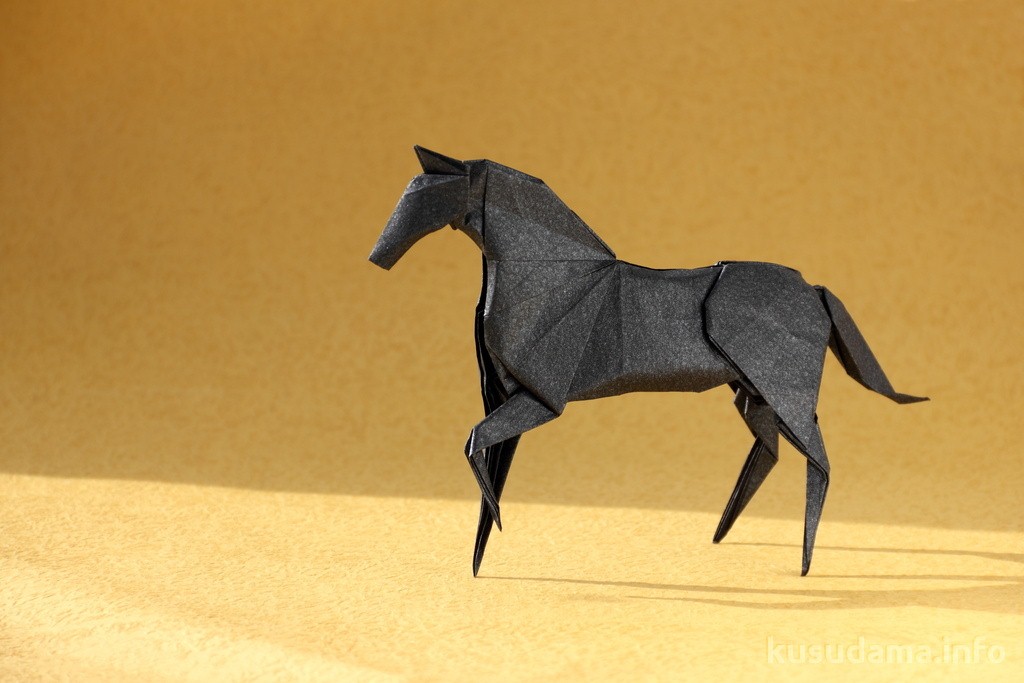
Graceful horse
Even beginners can make such a horse: the simple scheme begins with assembling the basic “double square” shape. Next, you need to stock up on scissors and continue assembly according to the following instructions:
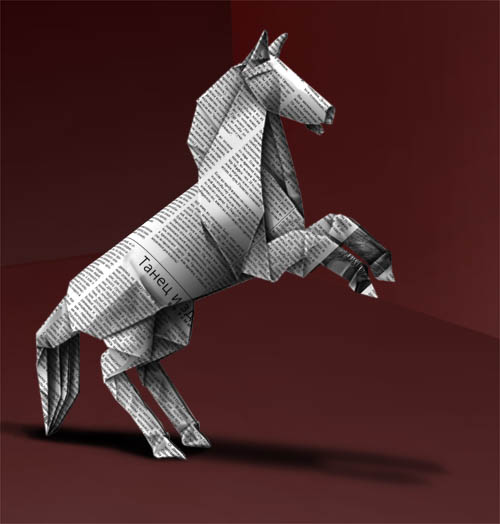
Strong horse
A pair of thin-legged horses can make a strong horse. To do this, you need to prepare a square sheet of paper and follow the step-by-step instructions:

Little foal
A cute little horse - pony - will also be made from a square sheet. This MK differs from previous origami horse patterns in that, in addition to assembly, it involves working with scissors. You will also need felt-tip pens or paints to color the finished craft.
If all the necessary materials and tools are prepared, you can begin to perform the following steps step by step:

Now all that remains is to design the resulting models: draw or cut them out of colored paper and glue on the saddle, harness, and mane. Those who do not know how to draw can use ready-made templates. It is not necessary to put a saddle on the skate; it can be decorated with “apples” or stripes.


Video MK origami horses
Making a three-dimensional modular figure of a horse
Modular origami will help you create various three-dimensional models with your own hands, including horses. The key element of the figure is the traditional standard origami module, which is folded from a small paper rectangle. How to fold the module, you can see the photo below: 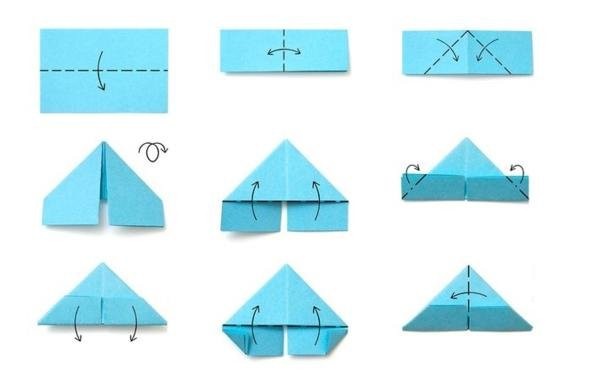
The modules are used to gradually assemble the parts of a horse or pony figure - body, head, legs and tail. To ensure that all parts adhere well to each other, you can glue them as you work.
The master class gives the general principle of assembling a three-dimensional horse: each master can assemble it in his own way, having thought out the design and details himself.
General job description:
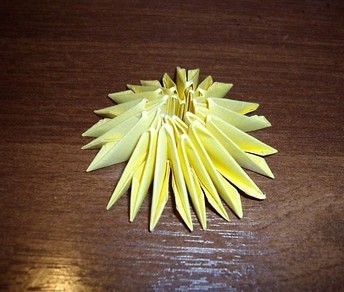
- Prepare elements for the body and mane, tail, hooves (in this example - 366 yellow and 36 brown).
- The body is assembled: the modules are connected in a circle with the long side outward.


- On the 3-4th row, lift the modules with their sharp ends up and continue putting on the rows to the desired height.
- To form the neck: put the rows with the short side outward on two modules from the previous row (“the mane” is also put on, with the long side outward).


- Form the head: connect several rows into a ring and raise them with sharp corners, continue the rows, not forgetting the “mane”.

- Place several modules on top of each other on two opposite sides to form “ears”.
- Connect the head to the body and form a muzzle from a ring of modules gathered into a bun.


- Make legs from three modules of brown and yellow colors.


- Attach a tail.
- Glue on the eyes.
Video tutorial on creating a modular horse
You can also watch the video on how to make a horse using modular origami technique.
A selection of schemes and ideas for creativity
What other origami-style paper horses are, you can see from the photo:


In order to make a horse out of paper, you will need the following: thick colored paper or medium-density colored cardboard, A4 sheet, stationery (or any other) glue, paper scissors, nail scissors, thread, a needle with an eye, two large and two small buttons , nail polish with glitter and a pencil or pen.
First you need to make a stencil. To do this, on a white A4 sheet you need to draw the horse’s torso and legs separately. The image can be anything, both realistic and abstract, for example, in the form of a cartoon character. It depends only on desire and imagination, but it is important not to forget to sign the front side.


After which all parts of the stencil should be placed on colored paper.

Trace them with a pencil.

And then cut it too.

It turns out one side of the animal is made of colored paper, so the next step is to make the back side of the horse. To do this, you just need to turn the stencil over from the front side to the back side and do the same. You should end up with mirror pairs of all the parts like this.

After which they should be glued in pairs, let the glue dry a little and adjust the parts to each other, if necessary. There should be five pieces in total: a torso and four legs.

Then you need to attach the hind legs to the horse’s torso, one in front, the other in back, and make two holes using a needle for large buttons.

Now all that remains is to connect the blanks and buttons by stitching them with a thread and a needle.

With the front legs you need to do the same thing, only using small buttons.

This method of fastening will make the horse’s legs mobile and add volume to the product. The horse is almost ready, all that remains is to complete the final decoration. To do this, lines are drawn separating the mane and tail from the animal’s body, and then these areas are covered with glitter varnish.

The final look of the craft. Photo 1.

The final look of the craft. Photo 2.
The paper horse is ready, all you have to do is wait until the varnish dries.
In Japanese, origami means folded paper. The history of its origin goes far back to Ancient China. It was there that paper and the first figures originally appeared. But this served only as a necessity in life. The most common to this day is the Chinese paper lantern.
Often during burial, the personal belongings of the deceased were replaced with paper strips on which it was written that they were being replaced. However, origami as an applied art developed in Japan. The word “God” in Japanese is consonant with the word “origami”, so this art began its development within a religious framework.
Temples were decorated with paper crafts. Paper was used as kindling for kindling sacrificial fires, and in boxes made of paper, gifts were presented to temples. Gradually, origami began to go out into society, beyond the gates of monasteries and temples. More and more different techniques appeared, but only a select few, people from the upper classes, owned them. The ability to fold various figures was a sign of good form.
When paper became known to everyone and was easily available, its price dropped significantly. It was then that origami gained its popularity in other countries and classes. This type of art was respected in Korea, Germany, and Spain.
Origami symbols were invented only in the middle of the twentieth century. They made it possible to significantly simplify the description of the circuit. The Japanese Akira Yoshizawa was the initiator and author.
Types of origami
According to the type of origami is divided into several types. Modular - folding one figure from several, wet - folding from wet paper, folding according to a development (pattern). And the simplest is the usual origami. Even children can make such figurines. From animals you can make a zoo. And under magical hands, animals come to life.
Beginning of horse making
To build a horse that can flip, you need to follow a few simple steps.
1. Place a square-shaped piece of paper in front of you. Fold it diagonally, connecting the lower right corner to the upper left and iron it. Expand. Also connect the lower left corner and the upper right, iron, unfold.
2. Then, turn the sheet over and fold it in half. You should end up with 2 rectangles. Unfold, rotate 90 degrees and fold in half again. Lay it out. As a result, the straightened square should have 8 triangles. 
3. Turn. The sheet should lie in front of you so that there is a diamond shape. Grab the side corners and connect them to the bottom corner. When folded, the top corner will also be pulled towards the bottom. Iron the resulting smaller diamond. 
How are legs made?
4. Grab the right corner of the top layer and fold it towards the fold line in the middle to create a right triangle, point down. Do the same with the left corner. Bend the top corner along the top line of the triangles. Open stacked triangles.
5. Cut the top sheet along the vertical fold line to the horizontal.
6. Bend the resulting parts up so that you get 2 rhombuses.
7. Then, fold each of these elements in half along a long diagonal.
Tail and head
8. Turn the figure over. Now do the same again from points 4 to 8. 
9. You should get a figure that looks slightly like a rocket. Then, bend the upper right part of the part at an angle of 45 degrees so that the fold line is a continuation of the inside of the left part. On the left part, bend the corner to the left to create a head. 
10. In order for the horse to be able to make turns, it needs to be slightly modified. To do this, straighten the tail, open it from the outside. Now fold it inward along the folds. Do the same steps with the horse's head. Ready! Now she can not only walk, but also roll over.
To make your horse stand more confidently on its feet, bend the corners of its legs inward. To perform somersaults, hit it sharply on the inside of the tail. 
An ordinary sheet of paper, instructions and a few minutes not only calms you down, but also puts your thoughts in order.