How to sew a knitted pullover. How to Make a New Sweater from Old Sweaters: Wool Recycling

Step 1. Shoulder seams
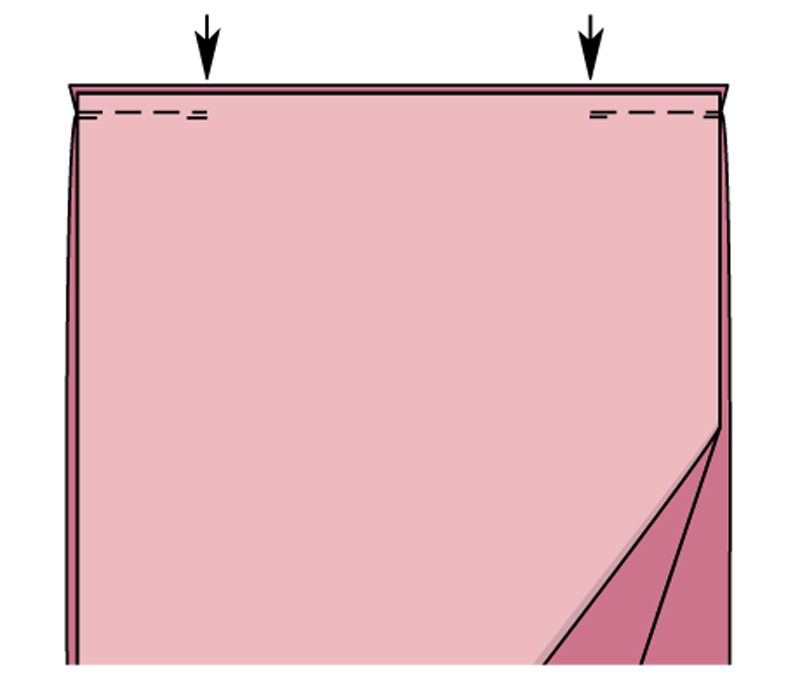
Overcast all sections of the details of the front, back and sleeves. Fold the front with the back with the front sides, exactly aligning the upper edges, chop off (). Run the shoulder seams, leaving a 35 cm long section open in the middle for the neckline (arrow marks). At the beginning and at the end of each seam, perform a backtack. Iron the seam allowances.
Step 2. Side seams

Run the side seams, leaving a 25-26-27 cm long section open on each side at the top for armholes. At the bottom, for all sizes, finish each line, not reaching 31 cm to the lower edge of the back (longer edge). At the beginning and at the end of each seam, perform a backtack. Iron the seam allowances, iron the allowances along the edges of the cuts on the wrong side ().
Step 3 Collar

Fold the collar piece with the front side inward, stitch the sections 39 cm long. Iron the seam allowances. Fold the collar in half with the inside out. Overcast open sections together.
Step 4. Stitch the collar

Stitch the open edges of the collar into the neck with the right side to the front side, aligning the collar seam with the line of the middle of the back. Stitch the collar, interrupting the stitching at the shoulder seams.
Step 5 Sleeves

Fold each sleeve lengthwise in half with the front side inward. Stitch the edges of the sleeve 58 cm long. Iron the seam allowances. Stitch the sleeve into the armhole right side to the right side, matching the seam of the sleeve with the side seam. Sew on the sleeve, starting / ending the line at the side seam.
Step 6. Hemming the bottom, cuts

Spread out the allowances along the edges of the cut. Iron the bottom hem allowances to the wrong side and stitch at a distance of 1.2 cm. Turn the allowances along the edges of the cut back to the wrong side and stitch in the same way, lay the line across the ends of the cuts. Fold the bottom of the sleeves in the same way.
The approach of winter cold makes you hide your favorite short dresses, plaid shirts and give preference to something knitted, woolen and warm. Surely each of us has a sweater in the bins of the wardrobe, which we will definitely never wear. Don't rush to throw it away. Because today we have prepared 15 incredible ideas to recycle an old unwanted sweater into an interesting, fashionable or practical item for your wardrobe or home.1. Knitted skirt
Warm and knitted skirts are one of the must-haves of this season. A self-respecting fashionista does not have to run around all the boutiques of the city in search of a model that will sit like a glove. We suggest re-wooling your closet stock and making one out of an ordinary sweater.And for such a new thing, you just need: scissors, threads, possibly an elastic band, pins for measurements. Of course, if you skillfully use a sewing machine, and there is one in the house, the process will go much faster. In general - cut off the desired part of the sweater, sweep from the cut side, if necessary, insert an elastic band or a lock. Half an hour and your skirt is ready.
.jpg)
2. Dress: option 1
You can create a very pretty dress from a large size pullover that will not only keep you warm on cold evenings, but also emphasize your slimness. How to sew such a wonderful outfit is shown in the following photo. For even more extravagance, we recommend sewing leather details on the elbows, belt or collar.
3. Dress: option 2
And this version of the dress is suitable even for an important event or New Year's party. It is enough to add a skirt, collar and cuffs made of lace or any other delicate fabric to the sweater. Such bows are in the trend of the autumn-winter 2016-2017 season.
4. Warm hat
Everything ingenious is simple. We take a sweater, cut out two sides along the contours of some sample, sew it together. Warm, cute and bright hat will warm your ears in the most severe cold.
5. Mitts and mittens
You should not spend time on knitting or money on buying mittens that will hide your hands from the first frost. You can easily make them all from the same old friend of ours.
And to replace the mittens, fashionable fingerless mitts made from the sleeves of an old jumper are perfect:

6. New life
Has your favorite sweater gone out of fashion? It's not a problem. How about diluting it with the same lace? Gentle inserts in the neckline and in the cutout on the back will look especially elegant and fashionable. We recommend sewing on the lace by hand.
7. Designer blanket
If you have already accumulated a whole stack of recyclables, then you will get a wonderful original blanket. Woolen sweaters should be dumped. To do this, we place the blanks in a pillowcase in the washing machine for the longest mode and a strong spin. Next, the sweater mode into squares with a side of 26.5 and 15 cm. Sew. It is more convenient and faster to do this with a sewing machine. However, hand sewing with large stitches will add a special flavor to the plaid.
8. Original bag
Designers say that a girl should have as many bags as there are pairs of shoes. Let's add to our collection also . The instruction is simple: cut out the workpiece as in the photo, sew and turn it inside out.
9. Fashionable snood
Prices for trendy snood scarves from well-known brands are sky-high. So the idea of such an accessory with your own hands from an old sweater is to the liking of many. The best thing for our scarf is a knitted copy. We cut off the neck and sleeves, sew the sides, hem the fold with hand stitches and voila - your neck is always warm.
10. Cat bed
In the wild winter cold, not only we freeze. Our pets also want cozy and warm houses to curl up on a cool night. Armed with a pillow, scissors and needles, it is very easy to build a soft bed for your favorite fluffy:
11. Dog suit
In the approach of the New Year, please your dog with a warm new thing. Of course, our idea will not work for large representatives of the canine family, but small four-legged friends will be incredibly grateful to you. To do this, we only need a sleeve, in which we make cuts for the legs.
12. Winter pillowcases
An old sweater will also be a great base for warming your pillows. On buttons, fasteners, one-piece - there is a place for fantasy to roam.
13. Gaiters
Leggings were once used by dancers to warm the ligaments and prevent injury. In the 80s, this piece of clothing came into fashion and remains popular to this day. And from today you don't have to spend money on buying leggings - the sleeves of an old knitted jumper will do an excellent job of this function and will keep your slender legs warm.
Winter is the time to properly dress up a beautiful dog. But what if the clothes in all specialty stores are the same, and our princess needs something special?
There is a way out: we can sew cute clothes ourselves, even without a sewing machine. And quickly, simply and, importantly, with excellent savings for the family budget!
To create a special outfit for your beloved dog, you do not need to buy expensive fabric. You can sew an original sweater for your dog using old or unwanted items (below you will find a simple step-by-step guide with photos). For example, you probably have a small sleeveless jacket at home, as in the photo below. If we find something similar, we can start measuring.
How to take measurements from a dog (for a sweater)
To make the sweater fit, and the animal feel comfortable in it, we will take the following measurements and add an allowance where necessary:
- Neck girth + 2.5 cm;
- Chest girth (near the front paws) + 2.5 cm;
- Length from neck to tail + 1.3 cm;
- Distance on the inside - from the neck to the genitals + 2.5 cm;
- Length from neck to front leg;
- Front leg girth * ½.
At the same time, remember that it is better to measure several times, and only once - cut off!
We cut out a rectangle from a sleeveless jacket (sweaters, sweaters). Its width is equal to what we got in paragraph 1, and the length - in paragraph 3.

Optionally, you can cut off the elastic band of the neck and / or armholes - this fabric is suitable for the back of the future sweater.
Sewing a sweater for small dogs


Lower the triangle so that its sharp corner (top) is slightly lower than the neckline (2-2.5 cm). Pin the triangular piece with one edge to the long side of the rectangle so that one pin is at a point at a distance of p. 5 from the edge, the second at a distance of p. 6 from this place. Thus we will mark the ends of the holes for the legs. Make sure to pin it correctly: inside out to inside out. Please note that the length of the top and bottom of the sweater may not match, especially if you are sewing a sweater for a male. That's the way it should be.
When sewing the parts, leave an allowance of 1-1.3 cm. Start sewing with a “needle” seam in the upper part of the triangle, continue with a small zigzag (2x2mm) and, approaching the paw hole, again go to the “needle” seam. Skip the hole and repeat the same sequence for the bottom of the sweater, and then pin the second half of the triangle and sew it according to the indicated scheme.
Processing armholes in a sweater for dogs
You can leave the edges of the leg holes as they were after cutting the fabric. However, in this case, they will not keep their shape, the armhole will expand and lose its neat appearance. Moreover, if you used a knitted sweater, the threads will disperse, and then the whole product will have to be saved. So it is better to immediately process the armhole.
To do this, turn the sweater inside out and sew seam allowances to the inside of the sweater in a wide zigzag. Continue to the leg holes and you'll secure them as you go. This procedure will strengthen the seam and protect the edges of the hole from wear. Repeat it for the remaining three allowances.
Making the bottom of the sweater
To make the bottom of our sweater look neat, cut off the protruding edges of the top and line them up with the inside. Now you can fasten this edge or, if you first cut off the elastic at the neck, sew it on as a bottom elastic.

In many dogs, the torso narrows at the waist, and to emphasize it, you can shorten the elastic a little. So we will narrow the bottom of the sweater and emphasize the harmony of our pet, and also ensure that the finished product will sit much better on it.

A familiar situation - the closet is packed to capacity, there is nowhere even to shove socks, but a pair of jeans, a dimensionless cozy sweatshirt, two simple sweaters and a T-shirt bought a hundred years ago are worn from all this? Because no matter how beautiful and elegant a thing is, we will always be drawn to coziness and comfort. And that is why some new clothes after a single release "into the light" lie with us for years untouched, and some are worn out to holes. Then they pass into the category of “homemade”, are patched up, cut off and worn a little more ... And then more or less “live” patches are cut out of them and used as potholders, kitchen towels, etc. ... Conclusion - with your favorite little thing as with It is very, very difficult to part with a loved one! Therefore, I suggest revisiting your wardrobe for "no five minutes of discarded items" and giving them a second chance! After all, how many useful, beautiful and original things can be made from the same sweater!
1. Socks
Such bright and warm socks are sewn in one sitting from the sleeves of an old sweater. You only need to cut a piece of the sleeve to the desired length and carefully hem it in place of the cut so that the edge does not fray. These socks look very stylish under high boots or on top of ankle boots.

2. Puffs and pillows
Now pouffe bags are in fashion. They are very light, as they are stuffed with weightless holofiber or synthetic winterizer, comfortable and soft like down pillows. In addition, such puffs look quite stylish. It's easy to make them yourself. All you need is a junk sweater, heavy fabric for the bottom, fabric for the inner cover, stuffing, scissors, a needle, and thread.


Sew the inner cover and stuff it with holofiber or other stuffing, fasten it with a thread. Cut off the sleeves from the sweater and sew the holes formed from the inside. Stick a stuffed cover into the sweater and sew the bottom cut out of thick fabric from below.


3. Pillows


4. Bags
Unusual knitted bags can be easily made even if you don't like knitting! After all, you can use a ready-made knitting of an unnecessary sweater - just cut out two pieces of the desired size and shape, sew, fasten the handles, make an inner cover with pockets for your favorite little things and the new thing is ready!


5. New dress or skirt?
If you have several relatively new things that you don’t like or that are partially out of order, you can combine a new new thing from them, for example ...


6. Fashionable winter accessories
From one sweater, if you try hard, you can sew a very original set of warm clothes for yourself - a hat, mittens and even a scarf! And if you decorate them with felt flowers, ribbons, beads or buttons, you will have a few more favorite things.


7. Pencil
Cut out a piece of fabric from a sweater or other unnecessary knitted item and sew a warm case for a glass (a can without a lid, a miniature coffee can, an old cup with a broken handle ...) - now you have a cute pencil case.

8. Diary case
Notebook covers, unless of course it is high quality leather, wear out quickly. Sometimes you don’t even have time to fill it up to the middle - and it is already pretty shabby. Sew him a cover from a not very coarse sweater! Choose a brighter, patterned piece, or decorate it yourself.


9. Clothes and a soft bed for your beloved pet


The simplest scheme for a fashionable jumpsuit ...

And here is a comfortable and practical bed for your pet…

I think it's easy to guess how it is sewn. Cut off the top of the sweater from the bottom (draw a flat strip just on the “chest” and cut). Sew the inside of the neck, sleeves on the "brushes" and the bottom, fill it tightly with stuffing. From the "bottom" of the sweater, open and sew an oval pillow. Fill it with stuffing too. Now sew both parts and that's it!
10. Vintage candlestick
For such a candlestick, you only need jars and scraps of a knitted sweater!


11. We warm flower pots for winter

12. Knitted bracelets


13. Christmas balls in a "fur coat"
An original way to update New Year's toys is to sheathe them with knitted patches. Such toys "warm" by themselves.


14. Bottle cover
Another idea how unusual to serve the New Year's table! Let all the bottles be in winter coats.

15. Sox balls
Sox is a variation of the footback game in which all sorts of tricks are played with a small ball filled with sand or grains. They are made mainly from old socks, but you can use sweaters for the same purpose! Especially such a fake will be delighted with children, or your beloved cat!

16. Potholders


17. We insulate our phones, netbooks and e-books

The range of knitted fabrics in fabric stores is impressive! Here and natural cotton, and viscose weaves, and various lacostes with interlocks. If you sew for children, you probably don’t experience any particular difficulties: the main thing is to choose the right thread, needle and sewing machine seam for the fabric. But when sewing women's clothing, for the manufacture of which thinner fabrics are used, problems can arise. The machine stretches the knitwear while sewing, the needle pushes the fabric into the hole under the foot, and the parts of the clothes are sewn crookedly, all the while sliding off the desktop ...
How to sew thin knitwear on a conventional machine?
There is a way out: you need to starch the edges of the fabric! We will now show how to do this using the example of making women's golf.
Materials and tools:
- Fine stretch viscose,
- Threads to match the fabric
- tailor pins,
- Fabric scissors,
- Brush - any, but not thin,
- Starch - 2 tablespoons,
- Water - 300 ml,
Manufacturing:
1. Surely, you have noticed that the edges of thin knitted fabric sold in rolls are usually treated with something like glue. Thanks to the hard edges, it is easier to wind such a fabric into a roll and, of course, then rewind the desired footage to customers. To imitate this miracle glue, folk craftswomen suggested using a paste or starch solution. The essence of both liquids is the same: first, the liquid mass can be applied to the fabric, and then, after drying, used as a fabric sealant. The paste is prepared from water and flour, but the starch solution is made from water and starch. Pour two tablespoons of starch powder into a small saucepan and add half a glass of water. Mix these ingredients well, turning them into a slurry.

2. Put the saucepan on a small fire and gradually add water, stirring the solution. After pouring out all the prepared water, wait until the starch solution thickens a little. Stir again and remove from heat.

3. Cut out all the details for golf from jersey: neck, back, front and two sleeves. Bend the neck rectangle in half (across the knitted grooves) and iron to get a full-fledged workpiece. Place the neck folded in half on a large tray and apply a starch solution to all its edges (except the fold) with a brush. It is necessary to cover with a solution at least 1 cm of the fabric from the edge, because it is important that the future seam falls on the starched parts.
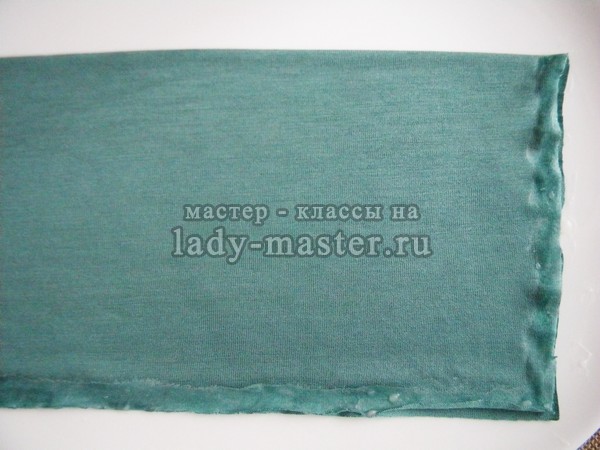
4. Cover all other details, except for the neck, with such starch strips on all sides (after all, one way or another, they will all be sewn and sheathed on a typewriter). Carefully, so as not to smear anything with starch, hang the fabric parts to dry and wait for the starch to harden. Then (after it is completely dry) iron the edges of the fabric to even out the details.
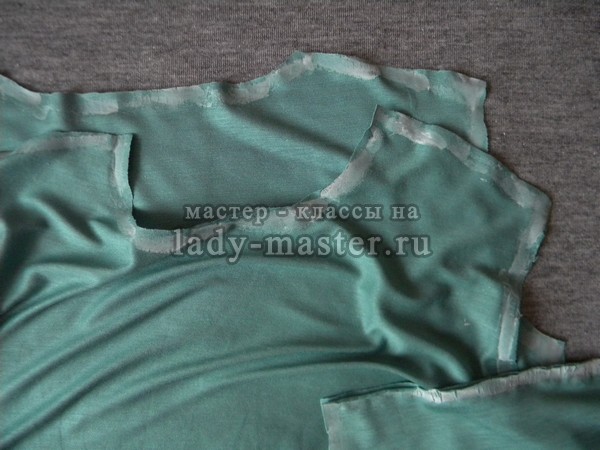
5. Front and back fold face to face. Fix the shoulder edges with pins and sew on a typewriter with a knitted seam (it looks like a small inclined zigzag) with an interval of 2.5. Then, to process the fabric allowances, go over the shoulders also in a zigzag with an interval of 1.5.

6. Expand the neck piece and fold it in half already parallel to the knitwear grooves (face to face). Sew the side edge with a knitted seam, and then turn the neckline to the front side, folding it along the previously ironed center.

7. Lay in front of you in front of you and the back of the golf course, which you have already sewn at the shoulders. Turn the neck with the fold down and, slightly stretching it, evenly place it along the entire cut of the main part and fix it with tailor's pins.
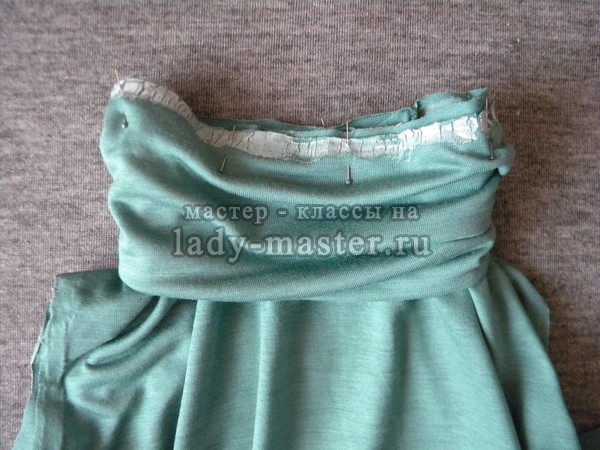
8. Sew the neck to the main part with a knitted seam, and then finish the edges with a zigzag.

9. This is how the neck seam will look like from the inside:

10. Attach the sleeves with pins to the main part of the sleeve and sew them with a knitted seam, and then with a zigzag. At the same time, do not forget that the allowances of the shoulder seams should turn out to be wrapped in the same direction in which you wrapped them when sewing the neck (towards the back or towards the front).

11. Turn the golf inside out, clearly match the sleeves and sides, fixing them with pins. Sew these seams with a knit stitch and zigzag: from the bottom edge of the sleeves through the armpits to the bottom edges of the golf.

12. Tuck the edges of the sleeves twice and sew with a straight seam, stepping back from the edge of 1 cm.
